


- Printed (pre-designed) tattoo design
- Thick, flexible paper
- Fine Sharpie
- Skin color Stocking
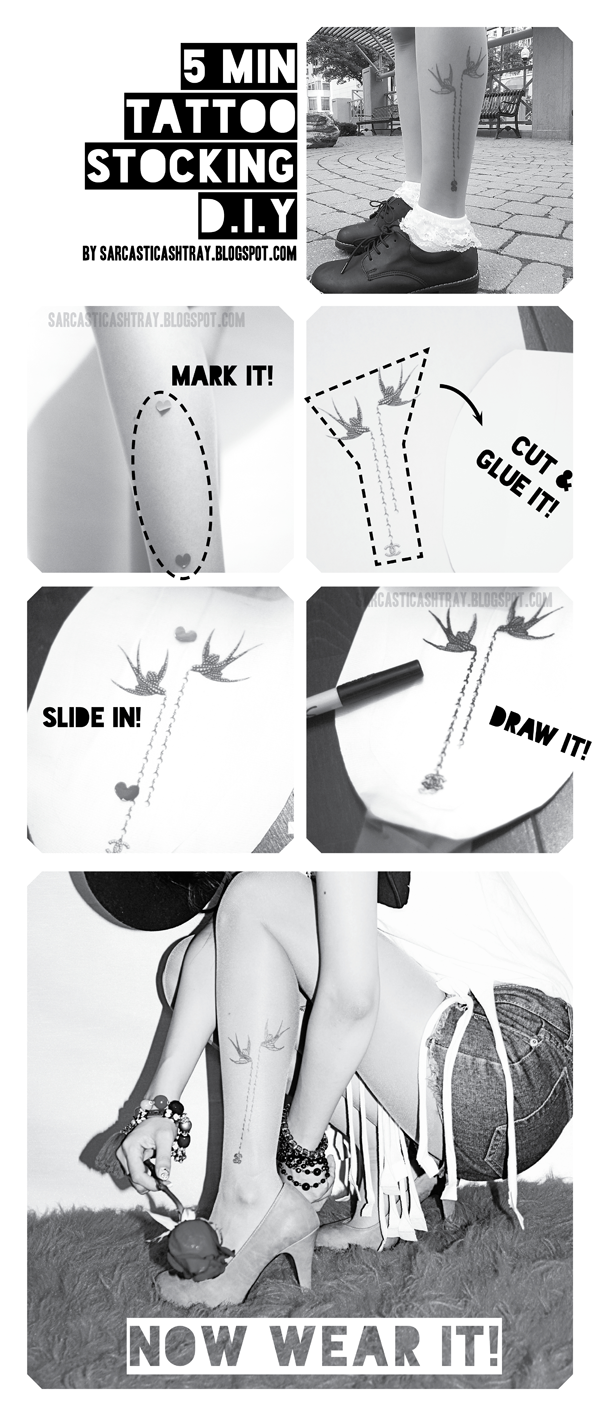

1. Wear the stocking. And Mark with the tape or sticker where you want the tattoo to be.
I recommend you to use tapes; I was so lazy to find the tape so I used sticker to mark the where the top and bottom will be.
And take the stocking off.
2. I found the image of Chanel Tattoo sticker, and photoshopped as I want.
Print it out, and cut it out and glue it on the thick paper.
Don't forget to cut the thick paper to round shape or the edge of it will rip your stocking like Grrrrrrrrr!
3. put the thick paper into the stocking and place it where you marked.
When you are putting the paper in Be careful not to rip your stocking.
THIS PIECE OF STOCKING IS TOO EXPENSIVE IN THIS COUNTRY!
4. Use a thin Sharpie to trace the image that you printed.
yep. Just draw it on stocking.
And DO NOT try to trace every single detail.
It will drive you insane.
and thin sharpie is not that thin.
And Pull out the thick paper.
and Wear it!
P.S It came out little bit less solid than I thought, but when I wore it, it actually looked like real tattoo.
my friends and my parents thought it was real ( and my parents almost got really angry lol )
P.S.2 After few wash the drawing will get little bit blurry , it means it's time to touch up!

No comments:
Post a Comment